
alcove shelves

Bespoke
These shelves normally fit in alcoves either side of a chimney breast. Alcove shelves are supplied approx 40mm longer to allow for variations in the width & angles of the alcove & must be trimmed to fit. The shelves are made shallower than the depth of the alcove so that the front of the shelf sits slightly back from the front of the chimney breast.

Variations
If the shelf depth required is deeper than the chimney breast the shelves can be made to project slightly. We can fit the shelves into corners using two batttons rather than three so that the shelf is tringular in plan or rectangular (in which case we use wall shelf brackets at one end). These shelves can be fitted into narrow rooms or spaces such as above doorways (see photo above). We can also make them deeper and thicker so that they can function as a floating desk.
Readymade Shelves
Our new Readymade shelves can be trimmed lengthwise (less than 1200mm) and widthwise (200-280mm) to match your alcove. They come sprayed with a primer perfect for any water or oil based topcoat, or unpainted
Technical Considerations
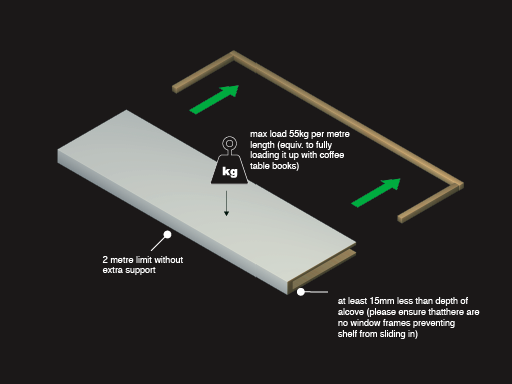
Alcove Shelves can generally be fitted to just about any wall type including plasterboard provided the correct fixers are used (we supply red wall plugs which are generally suitable). We can produce alcove shelves in sections upto 2.4 metres long but spans supporting heavy loads will need extra support in the middle from our wall shelf brackets (in such cases the back wall will need to be solid). Alcove shelves are supported by battons at the back and sides. The shelves slide onto the batton from the front so we need to ensure that there are no obstructions such as window frames which may obstruct fitting. The shelves are supplied longer than the width of the alcove and must be trimmed to fit each position. It is usually necessary to cut the shelf a few millimetres less that the width of the alcove & any gaps can be filled with decorators caulk which should be retouched to match the wall colour..
Finishes
Our Shelves are made using a combination of softwood, mdf and veneered mdf. They can be supplied unfinished, primed or painted, or varinshed (veneered finishes).
finished: The bespoke painted finishes can be done in a range of different eggshell colours including farrow and ball ranges and dulux ranges often colour matched in a smoother solvent based laquer. All paint finishes are sprayed.
veneered: We use real wood Oak or Walnut veneers for our wood finishes, (optionally) varnished with a wax/oil finish.
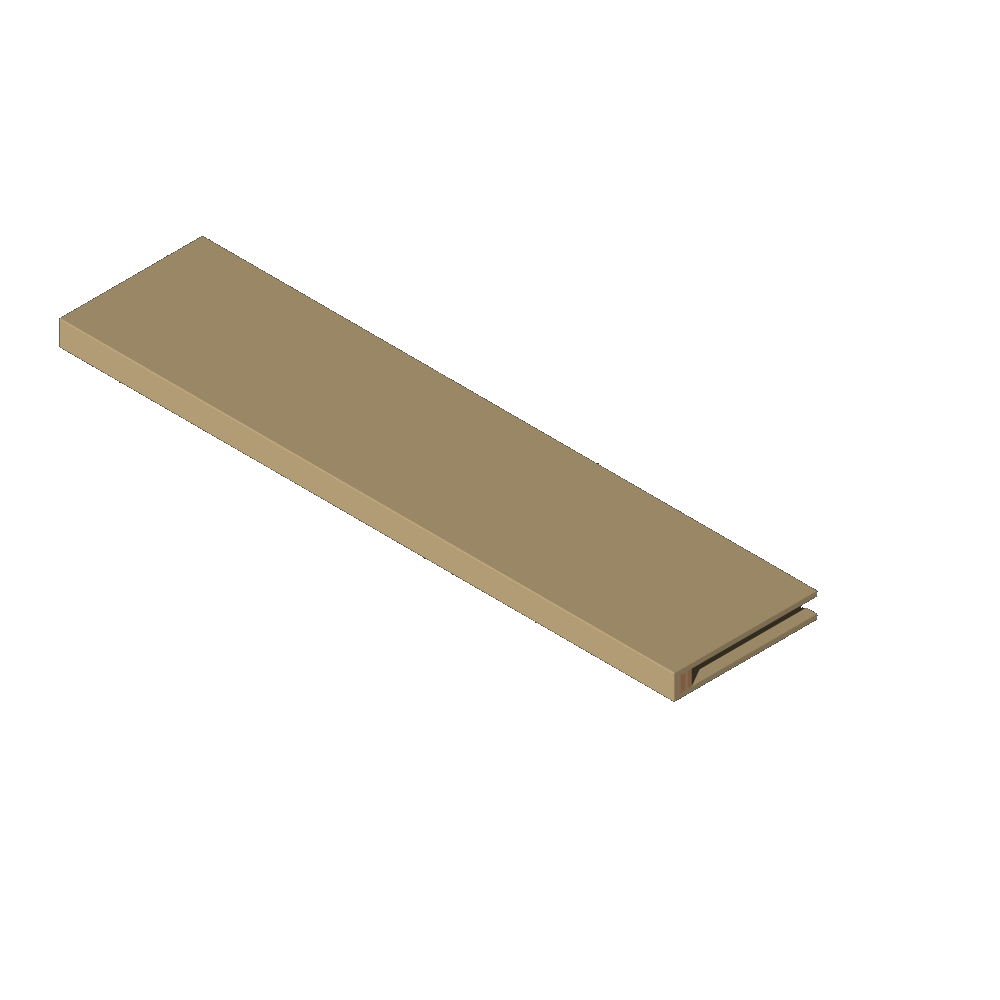
width 28cm x height 4.8cm
Unpainted mdf
Made from softwood & mdf the top, front & bottom sections are mitred so no difficult mdf edges to paint. Can be used for all wall types & trimmed to any size below the selected length & down to 200mm approx on the width
comes with side & back wooden batons, screws & brown rawlplugs
—————
ALCOVE SHELVES - FITTING INSTRUCTIONS
Tools required (ideally): Drill with hammer action, cordless drill/driver, small spirit level, tape measure, hammer, carpenters square, pull saw or other hand saw, 7mm masonry drill bit (for brown wall plugs), block plane, mastic gun. Materials required: decorators caulk, three strips of ply/mdf to make a template.
Prior to fitting put down dust sheets down to catch the dust from drilling.
To install the shelves:
1. Mark where the top of the batton should go on the centre of the back wall.
2. Working from the top fix the battons for each shelf, first fix the back batton; put in the middle screw first then level using the spirit level & put in the screws either side. In a similar way fix the side battons.
3. With all the battons up you are ready to trim & fit the shelves. Screw 3 strips of mdf (or any rigid sheet material) together to make a template of the size & shape of the alcove minus approx 2mm on the side. Check it will slide out of the alcove & adjust accordingly. Draw around it onto the shelf. Use the carpenters square to mark off 90 degrees on the front of the shelf. Using the saw trim the shelf to size.
4. Slide the shelf onto the battons. If slightly too tight to fit, mark where it needs to be trimmed and plane/sand down. Scribe & trim down the back of the shelf to match the contour of the back wall.
5. Once all the shelves are up you are ready to fill any gaps with the caulk, apply with the mastic gun. Caulk should be left for 12 hrs to dry completely.
6. Once the caulk is dry retouch the caulk to match your wall colour.
width 28cm x height 3.8cm
Paintable premium mdf
Made from softwood & premium mdf. the top, front & bottom sections are mitred so no difficult mdf edges to paint. Can be used for all wall types & trimmed to any size below the selected length & down to 200mm approx on the width
comes with side & back wooden batons, screws & brown rawlplugs

width 10-28cm x height 4.8cm
Unpainted mr mdf
Made from softwood & mdf (which paints well with water-based paints.) the top, front & bottom sections are mitred so no difficult mdf edges to paint. Can be used for all wall types & trimmed to any size below the selected length & down to 200mm approx on the width
comes with side & back wooden batons, screws & brown rawlplugs
—————
ALCOVE SHELVES - FITTING INSTRUCTIONS
Tools required (ideally): Drill with hammer action, cordless drill/driver, small spirit level, tape measure, hammer, carpenters square, pull saw or other hand saw, 7mm masonry drill bit (for brown wall plugs), block plane, mastic gun. Materials required: decorators caulk, three strips of ply/mdf to make a template.
Prior to fitting put down dust sheets down to catch the dust from drilling.
To install the shelves:
1. Mark where the top of the batton should go on the centre of the back wall.
2. Working from the top fix the battons for each shelf, first fix the back batton; put in the middle screw first then level using the spirit level & put in the screws either side. In a similar way fix the side battons.
3. With all the battons up you are ready to trim & fit the shelves. Screw 3 strips of mdf (or any rigid sheet material) together to make a template of the size & shape of the alcove minus approx 2mm on the side. Check it will slide out of the alcove & adjust accordingly. Draw around it onto the shelf. Use the carpenters square to mark off 90 degrees on the front of the shelf. Using the saw trim the shelf to size.
4. Slide the shelf onto the battons. If slightly too tight to fit, mark where it needs to be trimmed and plane/sand down. Scribe & trim down the back of the shelf to match the contour of the back wall.
5. Once all the shelves are up you are ready to fill any gaps with the caulk, apply with the mastic gun. Caulk should be left for 12 hrs to dry completely.
6. Once the caulk is dry retouch the caulk to match your wall colour.

width 10-28cm x height 3.8cm
Paintable premium mdf
Made to order from softwood & premium mdf -please tell us the depth you require (100-280mm) in the Additional Info box. The top, front & bottom sections are mitred, so no difficult mdf edges to paint. Can be used for all wall types & round to the nearest size listed trim to size.
comes with side & back wooden batons, screws & brown rawlplugs
—————
ALCOVE SHELVES - FITTING INSTRUCTIONS
Tools required (ideally): Drill with hammer action, cordless drill/driver, small spirit level, tape measure, hammer, carpenters square, pull saw or other hand saw, 7mm masonry drill bit (for brown wall plugs), block plane, mastic gun. Materials required: decorators caulk, three strips of ply/mdf to make a template.
Prior to fitting put down dust sheets down to catch the dust from drilling.
To install the shelves:
1. Mark where the top of the batton should go on the centre of the back wall.
2. Working from the top fix the battons for each shelf, first fix the back batton; put in the middle screw first then level using the spirit level & put in the screws either side. In a similar way fix the side battons.
3. With all the battons up you are ready to trim & fit the shelves. Screw 3 strips of mdf (or any rigid sheet material) together to make a template of the size & shape of the alcove minus approx 2mm on the side. Check it will slide out of the alcove & adjust accordingly. Draw around it onto the shelf. Use the carpenters square to mark off 90 degrees on the front of the shelf. Using the saw trim the shelf to size.
4. Slide the shelf onto the battons. If slightly too tight to fit, mark where it needs to be trimmed and plane/sand down. Scribe & trim down the back of the shelf to match the contour of the back wall.
5. Once all the shelves are up you are ready to fill any gaps with the caulk, apply with the mastic gun. Caulk should be left for 12 hrs to dry completely.
6. Once the caulk is dry retouch the caulk to match your wall colour.

width 28-35cm x height 4.8cm
Paintable premium mdf
Made to order from softwood & premium mdf -please tell us the depth you require (280-350mm) in the Additional Info box. The top, front & bottom sections are mitred, so no difficult mdf edges to paint. Can be used for all wall types & round to the nearest size listed trim to size.
comes with side & back wooden batons, screws & brown rawlplugs
————
FITTING INSTRUCTIONS:
Tools required (ideally): Drill with hammer action, cordless drill/driver, small spirit level, tape measure, hammer, carpenters square, pull saw or other hand saw, 6.5/7mm masonry drill bit (for brown wall plugs), block plane, mastic gun. Materials required: decorators caulk, three strips of ply/mdf to make a template, injectionresin (if the shelves are long & supplied with mid support brackets.)
Prior to fitting put down dust sheets down to catch the dust from drilling.
To install the shelves;
1. Mark where the top of each batton should go on the centre of the back wall.
2. Working from the top fix the battons for each shelf, first fix the back batton; put in the middle screw first then level using the spirit level & put in the screws either side. In a similar way fix the side battons.
(3. If your alcove shelves are long they may be supplied with mid support brackets/rods; 3a. drill 16mm dia holes into the wall using the pre drilled holes on the battons as a guide. The hole needs to be 70mm deep or to allow the projection of the rod to be slightly less than the inside depth of the shelves. The hole needs to be as square to the wall & level as possible. 3b. inject resin & push the rods in one hole at a time rotate the rod as you push it in. As the resin dries you can adjust the level buy using a screw as a wedge. The wooden block at the end of the block should be level with the back batton. 1c. Allow resin to cure.1d. Chip off excess resin.)
4. With all the battons up you are ready to trim & fit the shelves. Screw 3 strips of mdf (or any rigid sheet material) together to make a template of the size & shape of the alcove minus approx 2mm on the side. Check it will slide out of the alcove & adjust accordingly. Draw around it onto the shelf. Use the carpenters square to mark off 90 degrees on the front of the shelf. Using the saw trim the shelf to size.
5. Slide the shelf onto the battons. If slightly too tight to fit, mark where it needs to be trimmed and plane/sand down. Scribe & trim down the back of the shelf to match the contour of the back wall.
6. Once all the shelves are up you are ready to fill any gaps with the caulk, apply with the mastic gun. Caulk should be left for 12 hrs to dry completely.
7. Once the caulk is dry retouch the caulk to match your wall colour.

width 28-35cm x height 3.8cm
Paintable premium mdf
Made to order from softwood & premium mdf -please tell us the depth you require (280-350mm) in the Additional Info box. The top, front & bottom sections are mitred, so no difficult mdf edges to paint. Can be used for all wall types & round to the nearest size listed trim to size.
comes with side & back wooden batons, screws & brown rawlplugs
—————
ALCOVE SHELVES - FITTING INSTRUCTIONS
Tools required (ideally): Drill with hammer action, cordless drill/driver, small spirit level, tape measure, hammer, carpenters square, pull saw or other hand saw, 7mm masonry drill bit (for brown wall plugs), block plane, mastic gun. Materials required: decorators caulk, three strips of ply/mdf to make a template.
Prior to fitting put down dust sheets down to catch the dust from drilling.
To install the shelves:
1. Mark where the top of the batton should go on the centre of the back wall.
2. Working from the top fix the battons for each shelf, first fix the back batton; put in the middle screw first then level using the spirit level & put in the screws either side. In a similar way fix the side battons.
3. With all the battons up you are ready to trim & fit the shelves. Screw 3 strips of mdf (or any rigid sheet material) together to make a template of the size & shape of the alcove minus approx 2mm on the side. Check it will slide out of the alcove & adjust accordingly. Draw around it onto the shelf. Use the carpenters square to mark off 90 degrees on the front of the shelf. Using the saw trim the shelf to size.
4. Slide the shelf onto the battons. If slightly too tight to fit, mark where it needs to be trimmed and plane/sand down. Scribe & trim down the back of the shelf to match the contour of the back wall.
5. Once all the shelves are up you are ready to fill any gaps with the caulk, apply with the mastic gun. Caulk should be left for 12 hrs to dry completely.
6. Once the caulk is dry retouch the caulk to match your wall colour.